什么是LAMP?部署 LAMP (CentOS 7.2)教程
发布时间:2017-09-20 17:07
部署 LAMP (CentOS 7.2)
简介
LAMP指Linux+Apache+Mysql/MariaDB+Perl/PHP/Python是一组常用来搭建动态网站或者服务器的开源软件,本身都是各自独立的程序,但是因为常被放在一起使用,拥有了越来越高的兼容度,共同组成了一个强大的Web应用程序平台。
部署方式
在阿里云服务器下部署LAMP提供三种部署方式,镜像部署、一键安装包部署和手动部署(源码编译安装/YUM安装),一般推荐镜像部署适合新手使用更加快捷方便,安装包部署以及手动部署适合对Linux命令有基本了解的用户,可以满足用户个性化部署的要求。本教程主要介绍手动部署的方式。
手动部署
系统平台:CentOS 7.2
Apache版本:2.4.23
Mysql 版本:5.7.17
Php版本:7.0.12
安装前准备
CentOS 7.2系统默认开启了防火墙,需关闭后外部才可访问本机的80、21等端口,如需做安全类配置可自行参考官方文档。
关闭防火墙:
-
systemctl stop firewalld.service
关闭防火墙开机自启动:
-
systemctl disable firewalld.service
安装vim及unzip:
-
yum install -y vim unzip
编译安装apache准备
编译安装apache前需要安装apr、apr-util和pcre软件包和相关依赖包。
-
yum install -y gcc gcc-c++ autoconf libtool
安装apr
-
cd /usr/local/src/
-
wget http://oss.aliyuncs.com/aliyunecs/onekey/apache/apr-1.5.0.tar.gz
-
tar zxvf apr-1.5.0.tar.gz
-
cd apr-1.5.0
-
./configure --prefix=/usr/local/apr
-
make && make install
安装apr-util
-
cd /usr/local/src/
-
wget http://oss.aliyuncs.com/aliyunecs/onekey/apache/apr-util-1.5.3.tar.gz
-
tar zxvf apr-util-1.5.3.tar.gz
-
cd apr-util-1.5.3
-
./configure --prefix=/usr/local/apr-util --with-apr=/usr/local/apr
-
make && make install
安装pcre
-
cd /usr/local/src/
-
wget http://zy-res.oss-cn-hangzhou.aliyuncs.com/pcre/pcre-8.38.tar.gz
-
tar zxvf pcre-8.38.tar.gz
-
cd pcre-8.38
-
./configure --prefix=/usr/local/pcre
-
make && make install
编译安装Apache
-
cd /usr/local/src/
-
wget http://zy-res.oss-cn-hangzhou.aliyuncs.com/apache/httpd-2.4.23.tar.gz
-
tar zxvf httpd-2.4.23.tar.gz
-
cd httpd-2.4.23
-
./configure \
-
--prefix=/usr/local/apache --sysconfdir=/etc/httpd \
-
--enable-so --enable-cgi --enable-rewrite \
-
--with-zlib --with-pcre=/usr/local/pcre \
-
--with-apr=/usr/local/apr \
-
--with-apr-util=/usr/local/apr-util \
-
--enable-mods-shared=most --enable-mpms-shared=all \
-
--with-mpm=event
-
make && make install
修改httpd.conf配置文件参数
-
cd /etc/httpd/
-
vim httpd.conf
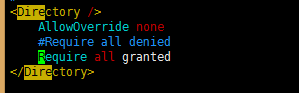
1.找到Directory参数,注释掉Require all denied添加Require all granted。
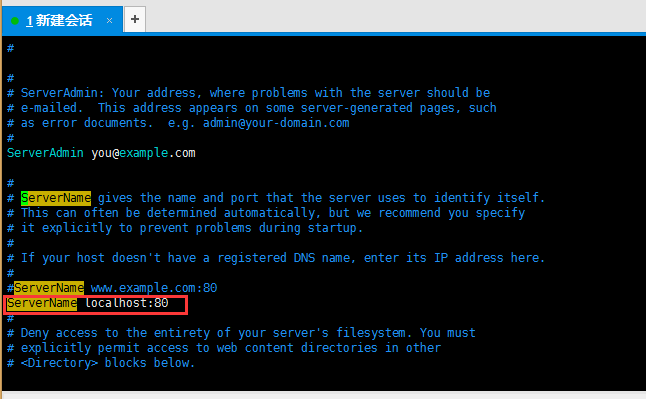
2.找到ServerName参数,添加ServerName localhost:80 然后,按Esc键后输入:wq保存退出。
设置PidFile路径
-
vim /etc/httpd/httpd.conf
在配置文件最后添加以下内容:
-
PidFile"/var/run/httpd.pid"
启动Apache服务并验证
-
cd /usr/local/apache/bin/
-
./apachectl start
-
netstat -tnlp #查看服务是否开启
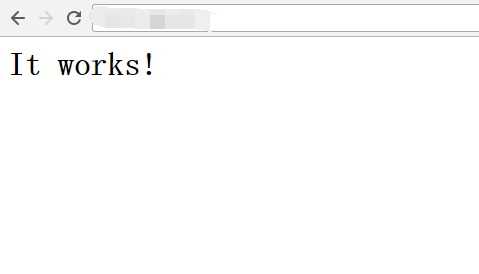
在本地浏览器中输入云服务器的公网IP地址验证,出现下图表示安装成功。
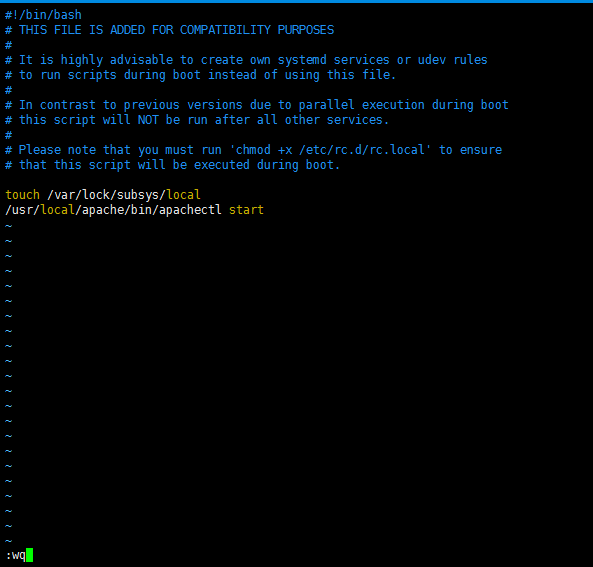
设置开机自启
在rc.local文件中添加/usr/local/apache/bin/apachectl start,然后输入:wq保存退出。
-
vim /etc/rc.d/rc.local
设置环境变量
-
vi /root/.bash_profile
在PATH=$PATH:$HOME/bin添加参数为:
-
PATH=$PATH:$HOME/bin:/usr/local/apache/bin
然后输入:wq保存退出,执行:
-
source /root/.bash_profile
编译安装MySQL前预准备
首先检查系统中是否存在使用rpm安装的mysql或者mariadb,如果有需要先删除后再编译安装。
-
rpm -qa | grep mysql #由下至上依次卸载
-
rpm -qa | grep mariadb
-
rpm -e xxx #一般使用此命令即可卸载成功
-
rpm -e --nodeps xxx #卸载不成功时使用此命令强制卸载
卸载完以后用 rpm -qa|grep mariadb 或者 rpm -qa|grep mysql 查看结果。
安装mysql
-
yum install -y libaio-*#安装依赖
-
mkdir -p /usr/local/mysql
-
cd /usr/local/src
-
wget http://zy-res.oss-cn-hangzhou.aliyuncs.com/mysql/mysql-5.7.17-linux-glibc2.5-x86_64.tar.gz
-
tar -xzvf mysql-5.7.17-linux-glibc2.5-x86_64.tar.gz
-
mv mysql-5.7.17-linux-glibc2.5-x86_64/* /usr/local/mysql/
建立mysql组和用户,并将mysql用户添加到mysql组
-
groupadd mysql
-
useradd -g mysql -s /sbin/nologin mysql
初始化mysql数据库
-
/usr/local/mysql/bin/mysqld --initialize-insecure --datadir=/usr/local/mysql/data/--user=mysql
更改mysql安装目录的属主属组
-
chown -R mysql:mysql /usr/local/mysql
设置开机自启
-
cd /usr/local/mysql/support-files/
-
cp mysql.server /etc/init.d/mysqld
-
chmod +x /etc/init.d/mysqld # 添加执行权限
-
vim /etc/rc.d/rc.local
添加/etc/init.d/mysqld start到rc.local文件中,然后输入:wq保存退出。
设置环境变量
-
vi /root/.bash_profile
在PATH=$PATH:$HOME/bin添加参数为:
-
PATH=$PATH:$HOME/bin:/usr/local/mysql/bin:/usr/local/mysql/lib
然后输入:wq保存退出,输入:
-
source /root/.bash_profile
启动MySQL数据库
-
/etc/init.d/mysqld start
修改Mysql的root用户密码
初始化后mysql为空密码可直接登录,为了保证安全性需要修改mysql的root用户密码。
-
mysqladmin -u root password 'xxxx'
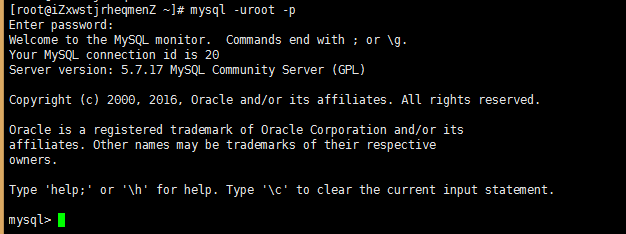
测试登录MySQL数据库
-
mysql -uroot -p密码#-p和密码之间无空格
编译安装php
依赖安装:
-
yum install php-mcrypt libmcrypt libmcrypt-devel libxml2-devel openssl-devel libcurl-devel libjpeg.x86_64 libpng.x86_64 freetype.x86_64 libjpeg-devel.x86_64 libpng-devel.x86_64 freetype-devel.x86_64 libjpeg-turbo-devel libmcrypt-devel mysql-devel -y
-
wget http://zy-res.oss-cn-hangzhou.aliyuncs.com/php/php-7.0.12.tar.gz
-
tar zxvf php-7.0.12.tar.gz
-
cd php-7.0.12
-
./configure \
-
--prefix=/usr/local/php \
-
--enable-mysqlnd \
-
--with-mysqli=mysqlnd --with-openssl \
-
--with-pdo-mysql=mysqlnd \
-
--enable-mbstring \
-
--with-freetype-dir \
-
--with-jpeg-dir \
-
--with-png-dir \
-
--with-zlib --with-libxml-dir=/usr \
-
--enable-xml --enable-sockets \
-
--with-apxs2=/usr/local/apache/bin/apxs \
-
--with-mcrypt --with-config-file-path=/etc \
-
--with-config-file-scan-dir=/etc/php.d \
-
--enable-maintainer-zts \
-
--disable-fileinfo
-
make && make install
复制配置文件
-
cd php-7.0.12
-
cp php.ini-production /etc/php.ini
编辑apache配置文件httpd.conf,以apache支持php
-
vim /etc/httpd/httpd.conf
在配置文件最后添加如下二行:
-
AddType application/x-httpd-php .php
-
AddType application/x-httpd-php-source .phps
定位到 DirectoryIndex index.html
修改为:
-
DirectoryIndex index.php index.html
重启apache服务
-
/usr/local/apache/bin/apachectl restart
测试是否能够正常解析PHP
-
cd /usr/local/apache/htdocs/
-
vim index.php #添加如下内容
-
php
-
phpinfo();
-
?>
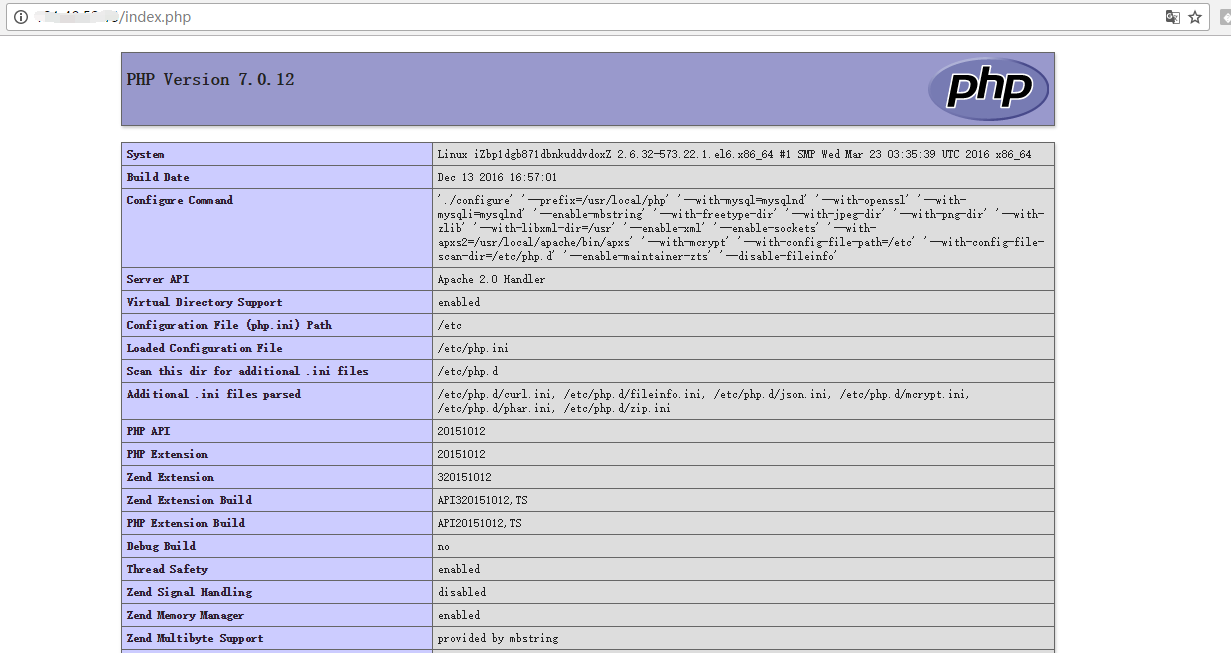
访问云服务器的公网IP/index.php,出现如下页面表示解析成功。
安装phpmyadmin
-
mkdir -p /usr/local/apache/htdocs/phpmyadmin
-
cd /usr/local/src/
-
wget http://oss.aliyuncs.com/aliyunecs/onekey/phpMyAdmin-4.1.8-all-languages.zip
-
unzip phpMyAdmin-4.1.8-all-languages.zip
-
mv phpMyAdmin-4.1.8-all-languages/* /usr/local/apache/htdocs/phpmyadmin
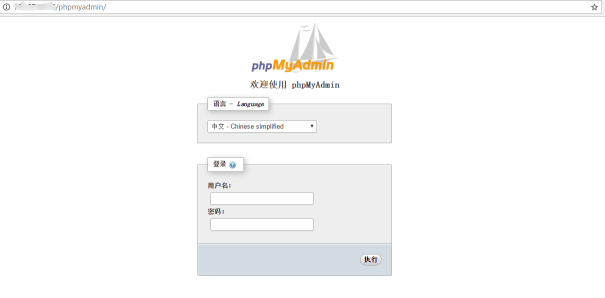
访问ip/phpmyadmin即可访问到phpmyadmin登录页面,输入mysql的用户名以及密码即可登录。